Have you found yourself setting due dates for your content items and wondering who is responsible for them before they get published? The built-in editorial calendar is an easy way to keep the content items and their assignees on track. You can use it together with the project overview to benefit your planning.
Let’s visualize your content ahead
Let’s start visualizing your content items’ operations – go to Home > Editorial calendar. You can see due dates, content items scheduled for publishing, and published content items.The calendar puts your content items into four categories. This is to help you quickly check how your content production efforts are going:
Change between the views you need
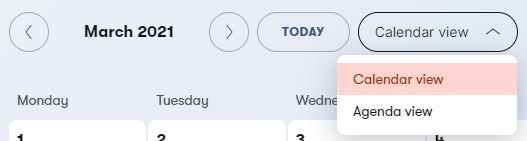
When strategizing, you may have different needs on how you want to view your content items. Using the dropdown next to the Today button, you can switch between:
Calendar view – an elaborative view of your content items’ flow and progress, which is useful when planning for the future and getting an overview.
Agenda view – a contracted view of the calendar, which helps focus on specific
Filter content items in your calendar
In a sea of content items, finding one or a set of them can be challenging. If you see too many content items, you can be at ease by narrowing your search using filters on Refine results. These settings do not affect your other filters in the rest of your project.
On track – shows that your content items are in progress before their specified due dates.
Delayed – displays the content items' progress is past their due date for publishing.
Scheduled – shows you when the content items will be published.
Published – indicates your content items are successfully published at a specific date.
It's good to know the details of these content items so that you're in the loop. Clicking on the content items will reveal its metadata – the name, workflow steps, status, contributors, and dates
Save filters, save time
You can be efficient with your time finding the same content types frequently by saving your filters:
Click on the top of the Refine results sidebar.
Click Save.
Type a name for the filter.
Click Save.
The saved filter is now shown under Yoursaved filters in that same panel where you can use it later.Filters can be saved in the content items list, project overview, editorial calendar, or dialogs where you select a content item.
Edit saved filters
To rename or remove a saved filter, click next to the filter name and make changes as needed.