Integrate Zapier (automation)
Integrate your Kontent.ai project with hundreds of other applications without writing the code yourself. Use our native Zapier integration .
.
What is Zapier?
Zapier helps you automate tasks using triggers and actions in an easy-to-use interface. This enables your team to automatically perform complex tasks such as deploying websites without the need to write any code. You can find a detailed introduction to Zapier terminology and usageCreate a Zap
An automated task in Zapier is called a Zap
Test the Zap
Once the trigger and actions are complete, you need to turn on the Zap. When you do, the integration will automatically create a webhook in Kontent.ai. In Kontent.ai, perform the action that should trigger your Zap. For example, if you chose the “Variant Created, Deleted, or Restored” trigger with this configuration, the Zap will execute when you create a new variant in any language. Your Zap will execute after a few moments. You can debug your Kontent.ai webhook and see the latest notifications to Zapier in Kontent.ai >Kontent.ai integration
With the native Kontent.ai integration in Zapier, you can create triggers, actions, and searches.Triggers
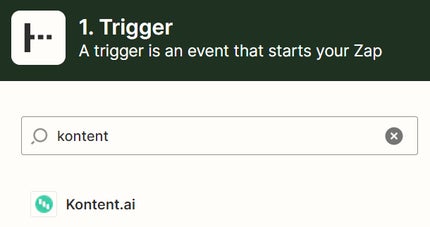
Triggers are always the first step of a Zap because they define when a Zap should run. With the Kontent.ai integration, you only need to configure the Zap in Zapier. The integration creates the webhook in Kontent.ai automatically when you turn the Zap on and deletes it when you turn it off. Each trigger in the Kontent.ai integration has an Events to watch field where you can specify one or more actions that trigger the Zap. For most triggers, if this is left empty, the Zap will run when any of the actions are performed. There are currently 4 triggers in the integration:- Variant Workflow Step Changed: Choose one or more workflow steps from your project. Whenever a variant moves into that workflow step, the Zap will trigger.
- Variant Published Status Changed: Choose Publish or Unpublish. Whenever a variant’s published status changes to that state, the Zap will trigger.
- Variant Created, Deleted, or Restored: Choose Create, Delete, or Restore. The Zap will trigger whenever a variant gets created, deleted, or restored.
- Taxonomy Group Changed: Choose Delete, Restore, or Create/Update. The Zap will trigger, whenever a taxonomy group gets deleted, restored, created, or updated.
{
  "data": {
    "items": [
      {
        "item": {
          "id": "42c21e82-0772-4d79-a6b3-c916e51b24ff"
        },
        "language": {
          "id": "00000000-0000-0000-0000-000000000000"
        }
      }
    ]
  },
  "message": {
    "id": "a268da50-b3c5-4d09-9b36-6587c8dea500",
    "project_id": "11a3492b-cd32-0054-51d2-8234ec4244a6",
    "type": "content_item_variant",
    "operation": "create",
    "api_name": "content_management",
    "created_timestamp": "2019-07-18T10:52:33.1059256Z",
    "webhook_url": "https://hooks.zapier.com/hooks/standard/47992d003732"
  }
}Actions
Actions are steps that allow you to modify your data in Kontent.ai. There are currently 4 actions:- Create Content Item
- Change Variant Workflow Step
- Update Language Variant
- Delete Language Variant
- Linked items: Accepted values are content item IDs and external IDs. You can combine them – for multiple linked items, some can be item IDs and some can be external IDs. You can use the Find Content Item action if you need to locate items for this field. You can also add a single value to each line or multiple values separated by a comma. For example, the output of a previous step might be an array such as
external_item_1, external_item_2. You can refer to this output in the linked item field on a single line.

- Taxonomy: This field accepts taxonomy IDs or codenames. Similarly to linked items, you can provide one value per line or comma-separated values on a single line.

- Assets: Like taxonomy fields, you can provide the asset ID or codename of an asset. Values can be added on a single line separated by commas or on multiple lines. You can use the Find Asset action to locate assets in your project.

- Dates and times: This follows the supported date/time formats specified by Zapier
. You can also pass a value obtained from a previous step as in the screenshot above. Examples of acceptable dates and times:
- tomorrow at noon
- next Friday at 7PM (Friday of the next week, not the current week)
- 2/13/2020 8PM EST
- 2020-10-26T16:56 (standard ISO format)
- 1393462573 (a UNIX timestamp)

Searches
Because the webhook notification from Kontent.ai only contains basic information, such as a content item ID and language ID, you may need to search your project for more information. For example, to load all data about a content item, you can use a Find Content Item action. You can search for an item based on its ID, codename, external ID, or any of the content type’s elements. There are currently 4 searches available:- Find Content Item
- Find Workflow Step
- Find Language
- Find Asset
en-US, for example) later on in the Zap or if you’re writing values to a Google Sheet and want to add the user-friendly name, you could add a Find language step. You can search for the language via ID. You will find all the details of the language in the output.
{
  "id": "1c37a40c-9158-031d-9d2d-adf65a568cd6",
  "name": "Czech",
  "codename": "cz-CZ",
  "external_id": "lang_czech",
  "is_active": true,
  "is_default": false,
  "fallback_language": {
    "id": "00000000-0000-0000-0000-000000000000"
  }
}