Set up an environment
You now have a solid idea of Kontent.ai’s versatility in content management and what kind of environment you want to set up. Let’s dive in on how to create an environment. This lesson will walk you through how you can create, clone, and configure your environment.
Create a new environment
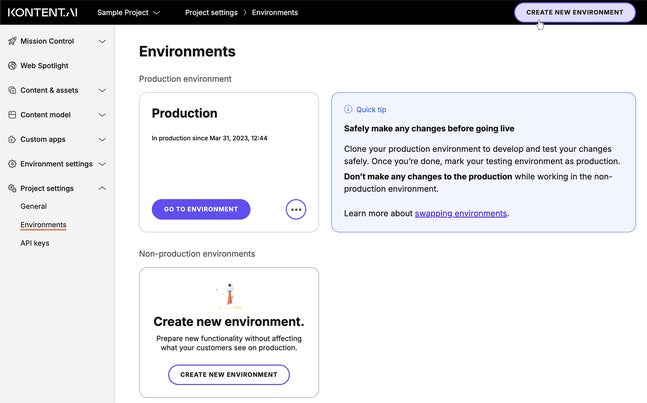
Creating an environment means you make a copy of a selected environment, such as Production. You can create a new environment in your- Name the new environment based on its purpose. Use an easily identifiable name such as Develop.
- Select which users to activate in the new environment based on their roles.
- Decide whether to include content and assets, and whether to preserve version history.
- Releases such as Release 2021-11-24, Release 2022/02
- Functionality such as QA, Staging, UAT, Develop

- Use environments to prepare changes in a safe space before going into production. Your developers then take care of propagating those changes to production.
- Use a new project for independent channels with different models and no shared content. For example, a new standalone mobile app with a different structure and content strategy than your website.
Identify your environment
After you create your new environment, you get a unique environment ID. The environment ID looks like this:8d20758c-d74c-4f59-ae04-ee928c0816b. For example, you can use the environment ID to retrieve content via API.
Choose an environment to work with
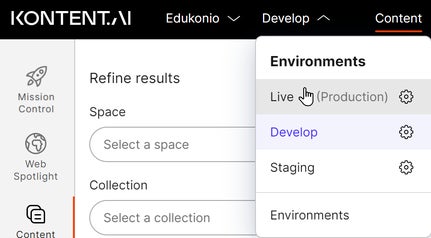
You can switch between the environments in your Kontent.ai project using the second drop-down at the top.
What does the new environment contain?
When it comes to data, outside of its unique environment ID, the new environment is an exact copy of the source environment. This means the new environment contains the content & assets, content model, and environment settings of the source environment.Tailor access levels for your new environment
In Kontent.ai, users can be assigned distinct roles and permissions within each environment. This ensures that individuals have appropriate access levels tailored to their responsibilities. For example, Developer roles can be assigned to non-production environments such as Develop.Project managers enjoy unrestricted access to all environments with all the associated content to oversee the entire project seamlessly.To maintain an optimal workflow, it’s crucial to restrict content creators to the production environment only. By doing so, content creators can focus solely on content production, and avoid creating content in the wrong environment. This practice safeguards content integrity and promotes efficient collaboration within the workflow.