Projects
A project is the primary organizational unit of your content. Create multiple projects to structure your content operations better when working with multiple clients.
- Get to know the basics of creating and setting up your first project.
- Once you have your project ready, you can migrate your project to use Web Spotlight.
Create projects
To create a blank project:- In Kontent.ai, click your initials in the bottom left corner.
- Select Projects.
- Click Create new project in the top right corner.
- In the project wizard, select Blank project.
- Enter the project name.
- Select a subscription for the project.
- Select a data center to store your data in.
- Requires a paid plan. When using the free trial plan, this option is disabled, and your data will be automatically stored in the default East US data center.
- (Optional) In the Create a clone from dropdown, select an existing project to be used as a project template.
- The list contains active projects under the Scale plan or higher
in which you’re the subscription admin.
- The list contains active projects under the Scale plan or higher
- Click Create project.
Create a sample project
- In Kontent.ai
, click your initials in the bottom left corner.
- Select Projects.
- Click Create new project.
- Choose which sample project you want.
- With the Kickstart sample project, you will learn to create a healthcare landing page through practical exercises and video instructions.
- With the Multi-site sample project, you get a preconfigured multi-brand sample project showcasing complex content structures and advanced functionality.
- Click Next step.
- Enter the project name.
- Select a subscription for the project.
- Click Create project.
Rename projects
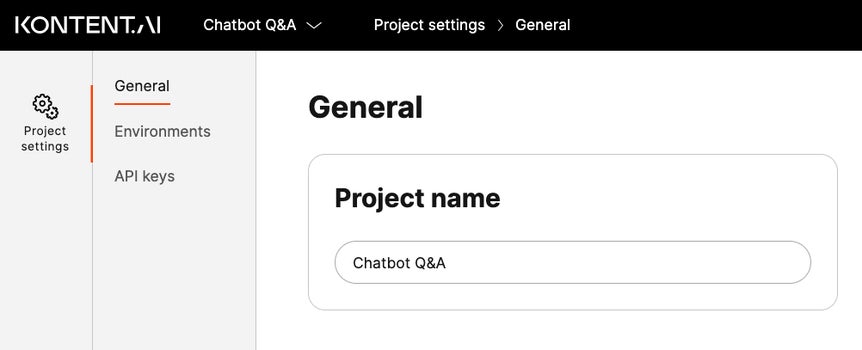
Need to change a project name? If you’re a subscription admin, you can rename the project by going to
Archive projects
Only subscription admins can archive projects. When you archive a project, its content cannot be accessed anymore, and all APIs for that project are disabled. Here’s a list of the most important things that are disabled after archiving:- Delivery API – This may break live applications that retrieve content from the project.
- Active users – All project contributors will be deactivated and lose access to the project content. They won’t count as active users unless they are active in other projects.
- In Kontent.ai
, click your initials in the bottom left corner.
- Select Projects.
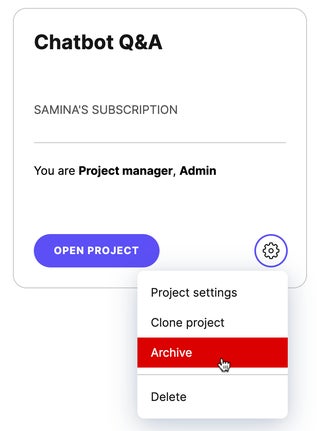
- For the project you want to archive, click
.
- Select Archive.

Restore projects
- In Kontent.ai
, click your initials in the bottom left corner.
- Select Projects.
- Select the Archived tab.
- For the project you want to restore, click Restore project.
Clone projects
Cloning a project will create a new project that is a copy of the source project. You can choose whether to clone the project with its content or without it.- Use environments to prepare changes in a safe space before going into production. Your developers then take care of propagating those changes to production.
- Use a new project for independent channels with different models and no shared content. For example, a new standalone mobile app with a different structure and content strategy than your website.
- In Kontent.ai
, click your initials in the bottom left corner.
- Select Projects.
- For the project you want to duplicate, click
.
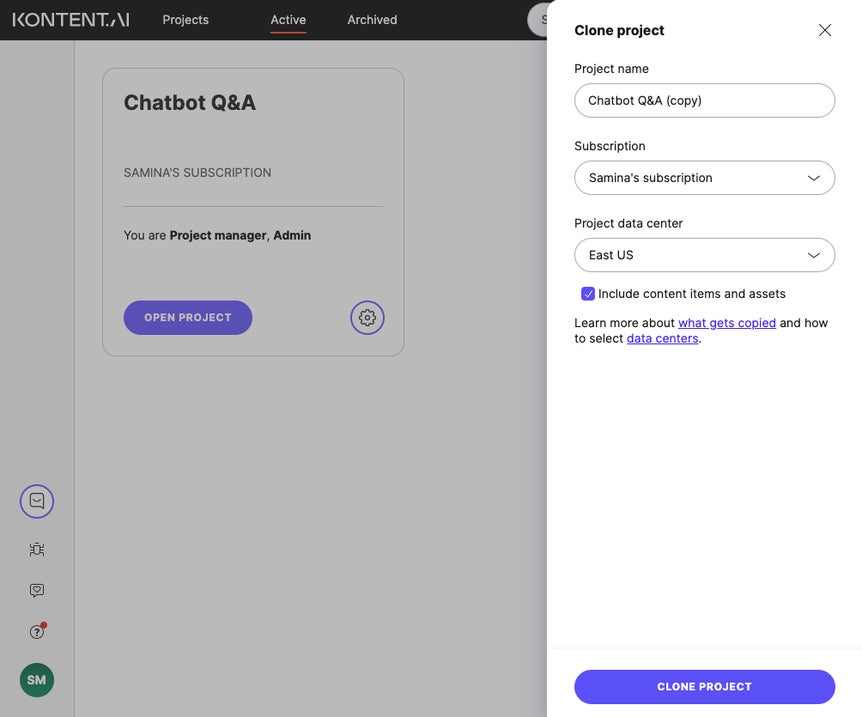
- Click Clone project.
- Enter the project name.
- Select a subscription for the project.
- Consider your subscription limitations for the maximum number of roles and languages that can be included in the plan.
- Select a data center for your data.
- (Optional) If you want to exclude content items and assets, clear the Include content items and assets checkbox.
- Click Clone project.

Considerations
There are a few things to keep in mind when creating a project copy:- The time to clone your project mainly depends on the number of content item variants and their version history. For example, 40,000 item variants might take about an hour.
- Once the project content is cloned, you can work with the project in Kontent.ai while the Delivery API data is being set up.
- We recommend not using the Delivery API on the cloned project while its content is being prepared because you might get incomplete data.
What gets copied
- Always included:
- Content types
- Content type snippets
- Spaces
- Preview URLs
- Taxonomy
- Languages
- Roles
- Workflow
- Users (only subscription admins)
- Collections
- Optionally included when you select Include content items and assets:
- Content items (including localized variants)
- Assets
- Contributor assignments (only subscription admins)
- Due dates
- Comments (author names and mentions of users who aren't subscription admins will change to Unknown user)
- Notes
- Never included:
- Revisions of content items (only the published and latest versions are cloned)
- Tasks
- Environments