First steps with Web Spotlight
Time to set up your project for Web Spotlight! Get to know what Web Spotlight looks like, how to activate it, and how to create a page tree.
Why Web Spotlight?
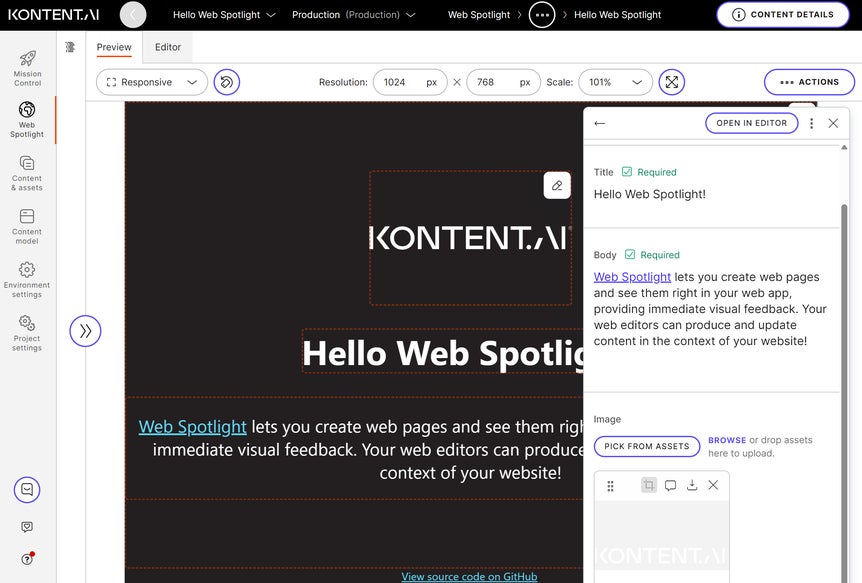
Content creators and marketers can manage their website content visually without leaving Kontent.ai. With Web Spotlight, you can quickly and easily add pages and edit the content displayed on your website. At the end of this learning path, you’ll have a simple web app that displays an interactive content preview in Web Spotlight. Just like you see in the image below.
Activate Web Spotlight
Web Spotlight is an add-on to Kontent.ai. This means it only adds new functionality and doesn’t change any of your existing content or content model. Let’s start with activating Web Spotlight for your project.- Using the two drop-downs at the top, open the project environment you want to set up as a website.
- Go to
Environment settings > General > Web Spotlight.
- Click Activate Web Spotlight.
- In the left menu, you’ll see
Web Spotlight.
- In Content model > Content types, you’ll get two new content types, Page and Web spotlight root.
- When editing content types, you’ll see the Subpages element.
Give your page tree a space to grow
Your Kontent.ai projects can contain content for multiple websites and web applications. To differentiate between them, you need to create spaces. This way, you can have a different Web Spotlight page tree for each website.
- In
Environment settings, select Spaces.
- Click Create new space.
- In General > Space name, type Website.
- In Web Spotlight > Root item, click Create new root item of the Web Spotlight root type.
- Name the root item Website root.
- Click Create.
- Click Save.