Import linked content
Content items often contain references to other content items in linked items elements or rich text elements. This lesson shows you how to import these references to Kontent.ai.
How to think about links between your content
To avoid having to import objects in a specific order, use external IDs to reference content that’s not yet imported. This solves problems with circular dependencies and lets you reference non-existent content. Here is how it works:- Define external IDs for all content items and assets you want to import in advance.
- When referencing another content item or asset, use its external ID.
- Import your content using the upsert methods with an external ID. The system will resolve all references.
Example scenario
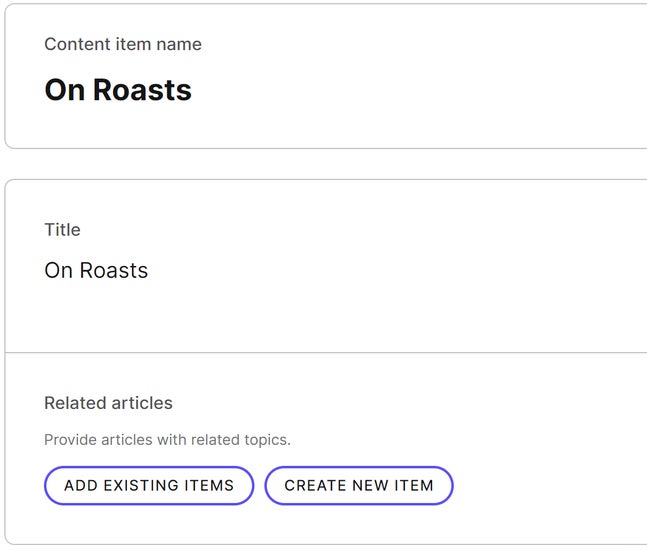
Say you want to import two related content items: Donate with us and On Roasts articles. Each content item references the other in the Related articles Linked items element. The result will have the following structure:1. Define external IDs
External IDs are string-based identifiers of items and assets defined by you. You can define new IDs or reuse IDs from the original storage system you are importing content from. It's up to you to ensure no two objects have the same external ID. See more details on using external IDs for imported content. For large projects, consider using GUIDs. To keep things simple here, use123 and 456 for your two articles.
2. Use external IDs to reference items
When defining the Linked items elements, use external IDs to reference the other content item:"related_articles": [
{
"external_id": "456"
}
]3. Import content
To create a content item, send a PUT request to the/items/external-id/<YOUR_ITEM_EXTERNAL_ID> endpoint.
In the body of the request, specify the item's name and content type.
See more details on upserting content items.
- You can run the same request repeatedly. If the item doesn't exist, it will be created. If it does, it will be updated.
- You can reference or link to your item, even if it hasn't been imported yet (and has no internal ID or codename). You might have other content items that reference this one in Rich text or Linked items elements. But if you are using external IDs you don't need to worry about the order in which the content items are imported.
// Tip: Find more about .NET SDKs at https://kontent.ai/learn/net
using Kontent.Ai.Management;

var client = new ManagementClient(new ManagementOptions
{
    ApiKey = "KONTENT_AI_MANAGEMENT_API_KEY",
    EnvironmentId = "KONTENT_AI_ENVIRONMENT_ID"
});

await client.UpsertContentItemAsync(
    Reference.ByExternalId("123"),
    new ContentItemUpsertModel { Name = "On Roasts", Type = Reference.ByCodename("article") });
// Tip: Find more about .NET SDKs at https://kontent.ai/learn/net
using Kontent.Ai.Management;

var client = new ManagementClient(new ManagementOptions
{
    ApiKey = "KONTENT_AI_MANAGEMENT_API_KEY",
    EnvironmentId = "KONTENT_AI_ENVIRONMENT_ID"
});

var identifier = new LanguageVariantIdentifier(Reference.ByExternalId("123"), Reference.ByCodename("en-US"));

var response = await client.UpsertLanguageVariantAsync(identifier, new LanguageVariantUpsertModel
{
    Elements = new dynamic[]
    {
        new TextElement
        {
            Element = Reference.ByCodename("title"),
            Value = "On Roasts"
        }.ToDynamic(),
        new LinkedItemsElement
        {
            Element = Reference.ByCodename("related_articles"),
            Value = new []
            {
                Reference.ByExternalId("456"),
            }
        }.ToDynamic()
    }
});

Second content item
Repeat the same process with the Donate with us article. Start by creating the content item:// Tip: Find more about .NET SDKs at https://kontent.ai/learn/net
using Kontent.Ai.Management;
var client = new ManagementClient(new ManagementOptions
{
ApiKey = "KONTENT_AI_MANAGEMENT_API_KEY",
EnvironmentId = "KONTENT_AI_ENVIRONMENT_ID"
});
await client.UpsertContentItemAsync(
Reference.ByExternalId("456"),
new ContentItemUpsertModel { Name = "Donate with us", Type = Reference.ByCodename("article") });
// Tip: Find more about .NET SDKs at https://kontent.ai/learn/net
using Kontent.Ai.Management;

var client = new ManagementClient(new ManagementOptions
{
    ApiKey = "KONTENT_AI_MANAGEMENT_API_KEY",
    EnvironmentId = "KONTENT_AI_ENVIRONMENT_ID"
});

var identifier = new LanguageVariantIdentifier(Reference.ByExternalId("456"), Reference.ByCodename("en-US"));

await client.UpsertLanguageVariantAsync(identifier, new LanguageVariantUpsertModel
{
    Elements = ElementBuilder.GetElementsAsDynamic(new BaseElement[]
    {
        new TextElement
        {
            Element = Reference.ByCodename("title"),
            Value = "Donate with us"
        },
        new LinkedItemsElement
        {
            Element = Reference.ByCodename("related_articles"),
            Value = new []
            {
                Reference.ByExternalId("123"),
            }
        }
    })
});
Validate imported content
After your import process is finished, we recommend that you validate your project's content for inconsistencies. For example, if you forget to add the second item, the validation will report that you’re referencing a nonexistent object. Project validation can also reveal other issues like references to missing assets or empty required elements.