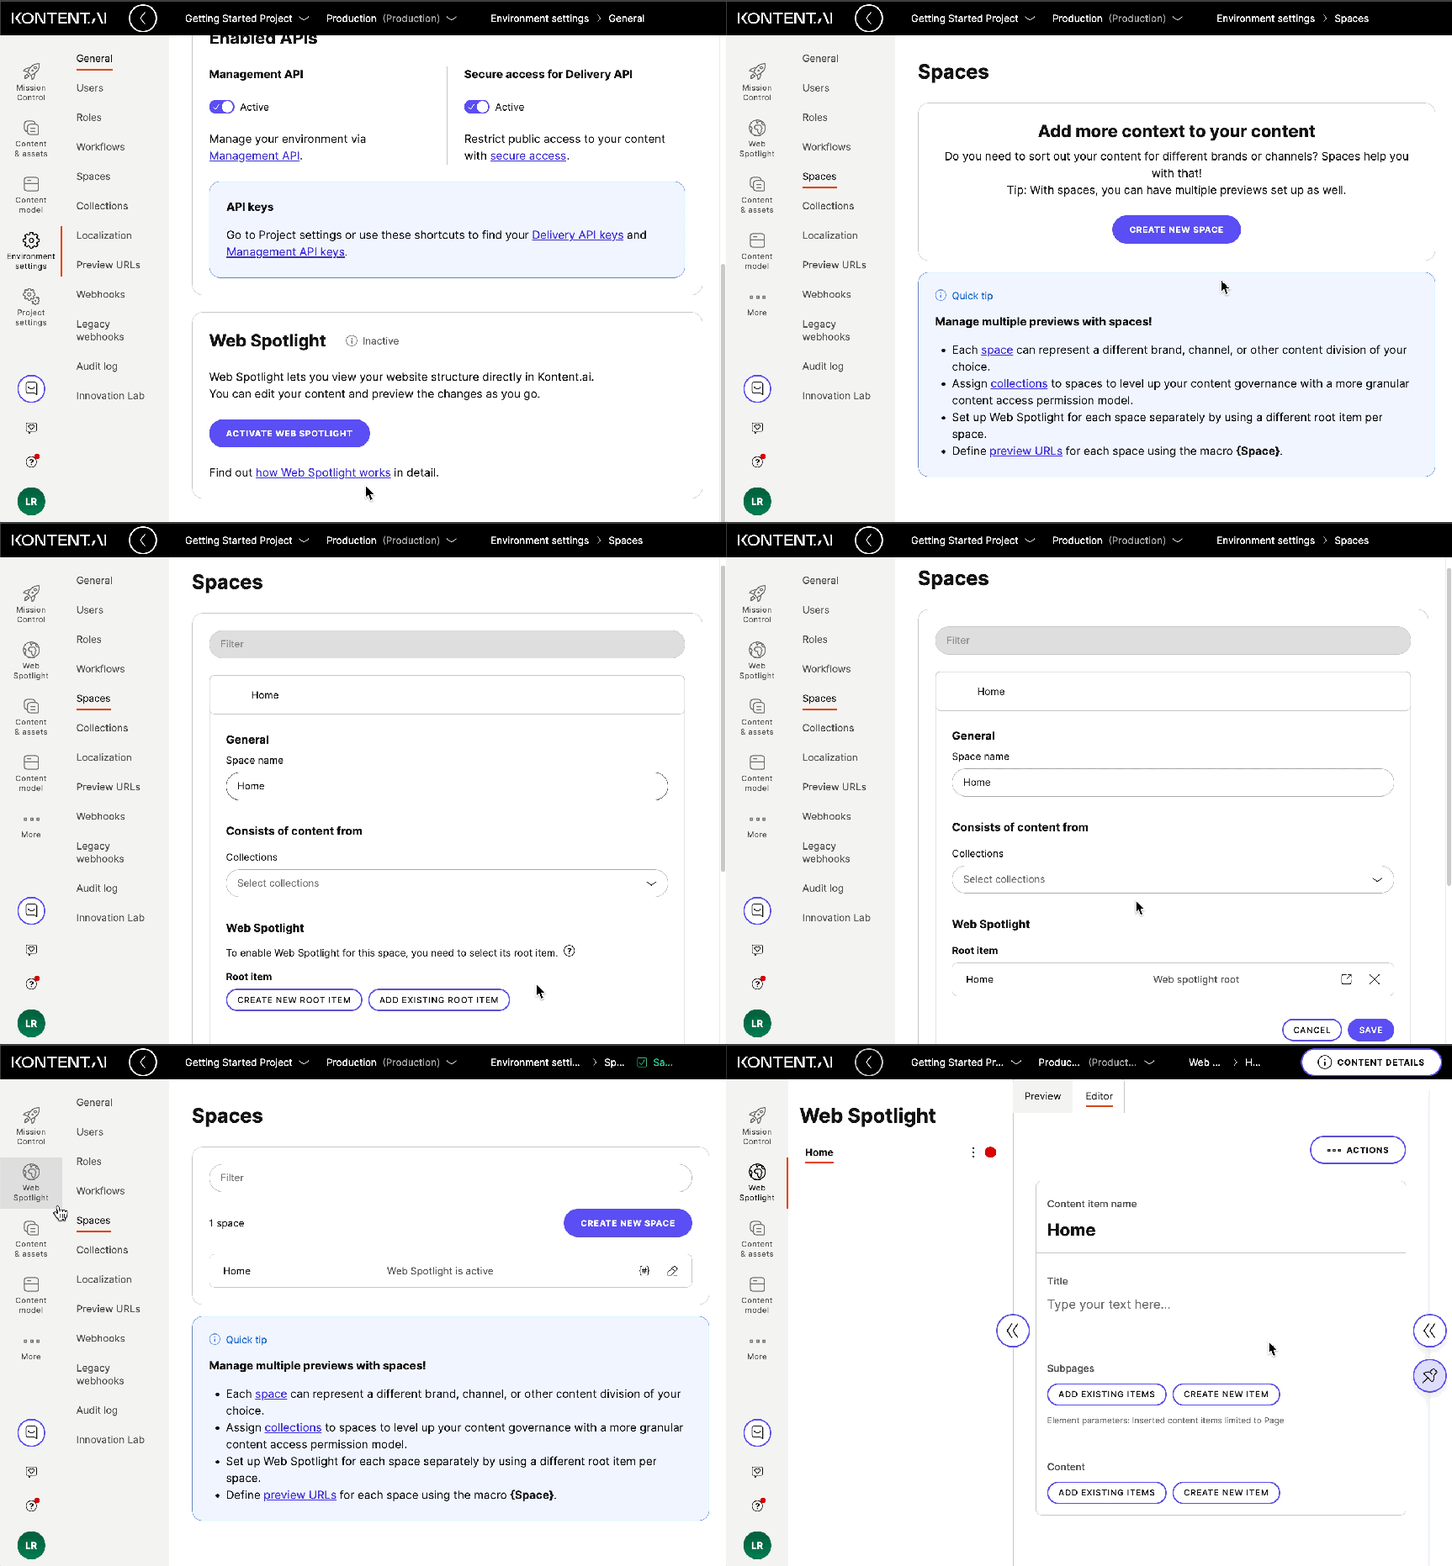
Activate Web Spotlight
Web Spotlight lets you create web pages and see them right in your web app, providing immediate visual feedback. Your editors can easily produce and update content in the context of your website.
- Discover how to best set up your multi-channel project to cover all your use cases, including website support.
- Find out how to manage your websites with Web Spotlight.
Do you have Web Spotlight enabled?
Web Spotlight is included in all existing enterprise and flex plans. You can activate Web Spotlight in the environments you want to use for a website.Activate Web Spotlight
When you have Web Spotlight enabled for your subscription, you can activate it for individual environments.- Open the project environment you want to set up as a website.
- Go to
Environment settings > General.
- In the Web Spotlight card, click Activate Web Spotlight.
Multi-website setup with spaces
Spaces enable you to run multiple websites in one project. To use Web Spotlight in a multi-website scenario, you need to select or create a root item in each space you want to manage as a website.- In
Environment settings, go to Spaces.
- Click
on the particular space you’re setting up as a website.
- Under Root item, create new or add an existing root item.
- Click Save.

What happens after Web Spotlight activation?
Once set up, you'll find several new additions to your content model:- Web Spotlight root content type is a core part of Web Spotlight that you can edit but not delete while Web Spotlight is active.
- Subpages content type element is a core part of Web Spotlight, which you need to use in your content model to create the page tree.
- Page content type is an optional part of Web Spotlight, which you can use for creating web pages.
Root item in Web Spotlight
The root item in Web Spotlight is the top-level content item that defines the root of your website hierarchy. You can choose any content item as the root item. If you want to display subpages under it, make sure its content type includes a Subpages element. This is optional and depends on how you want to structure your content. Alternatively, you can use the default Web Spotlight root content type provided by Web Spotlight. This content type includes the following elements:- Title element – specifies the name of the root item.
- Subpages element – specifies your website’s home subpages, for example, the top-level navigation. By default, this element is limited to pages.
- Content element – specifies a content item to use for the root of your website.
Subpages in Web Spotlight
The Subpages element is a means of creating your website hierarchy, commonly known as a page tree. You can use subpages with the predefined page content type or add them to your own content types.Page in Web Spotlight
The Page content type in Web Spotlight defines a page within your website. Pages represent the locations in your page tree. They are connected to items with specific content, such as articles or blog posts. The Page type defines the following elements:- Title – specifies the name of the page.
- URL – specifies the URL slug of the page. By default, it's auto-generated from Title.
- Show in navigation – determines whether the page should be visible in the page tree
- Some coding is required to make the Show in navigation element functional.
- Subpages – specifies the subpages of the current page, for example, several pages within a section of your website. By default, this element is limited to Page items.
- Content – specifies a content item to use for this page.