• Cheat sheets
  • Documentation
  • API reference
  • Product updates
  • Sign in
Kontent.ai Learn
  • Try Kontent.ai
  • Plan
  • Set up
  • Model
  • Develop
  • Create
Copyright © 2025 Kontent.ai. All rights reserved.
  • Web
  • Privacy policy
  • Cookies policy
  • Consent settings
  • Security
  • GDPR
  • Docs
  • Collections
    • Author content with AI
    • Create and delete content items
    • Comments and suggestions
    • Editorial calendar
    • Embed content through components
    • Find and filter
    • Linking
    • Project overview
    • Relations
    • Review content with AI
    • Rich text
    • Tagging
    • Versioning
  • Custom apps
  • Custom elements
  • Environments
  • Keyboard shortcuts
  • Mission Control
  • Projects
  • Task management
  • Terminology

Project overview

Martina Farkasova
10 minutes
Content items / Filters / Project overview
Download PDF
Once your project kicks off and content creators start working on the content, it’s vital to ensure everything runs as planned. With strict deadlines and timely reviews, there’s no room for slip-ups. That’s where the project overview steps in. Project overview helps you with visualizing your project’s planning status and allows you to quickly see whether you’re on track

Get a complete overview of your project

Consider project overview your friend who wants to help you with overseeing your content planning. Imagine it’s Monday morning and you’ve just arrived in your office. You’d like to find out the current status of your project. To see your project overview, click Mission Control > Project overview.
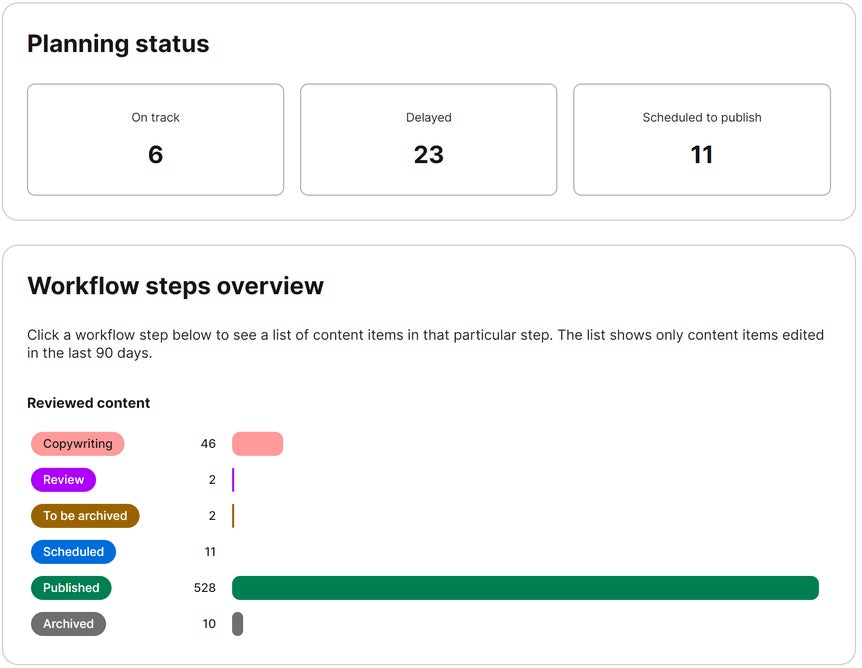
Project overview in a Kontent.ai project
The current status of your planned items together with what workflow step they're currently in.
Just by looking at the numbers here, you'll know whether something’s delayed or how many items are already scheduled to publish. You might argue now that this doesn't tell you much. Seeing the numbers is good, but you’re missing the context.

Digging deeper

By clicking any of the three tiles from the planning status – On track, Delayed, or Scheduled to publish – you’ll find more information about the items that fall into that category. Let’s say you want to know which content items are delayed. When you click the Delayed tile, you'll see the content items past their due date.
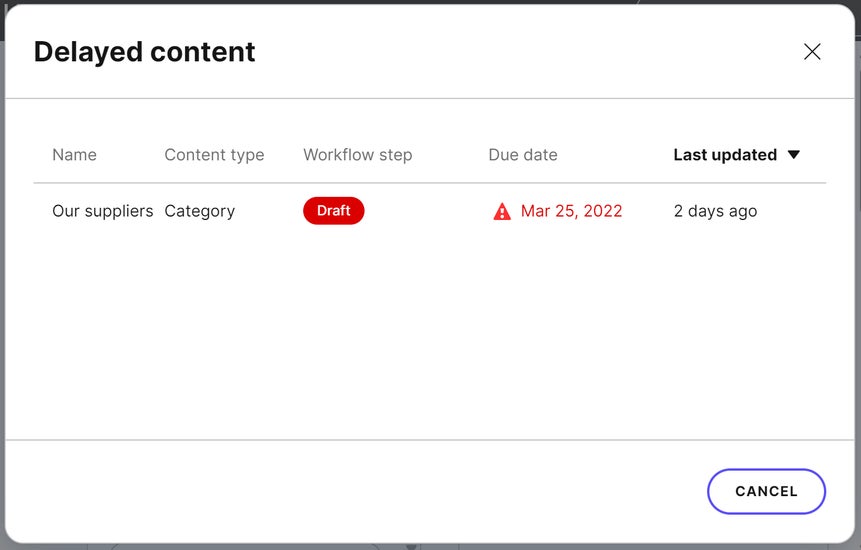
Viewing delayed content in Project overview
Viewing delayed content items.
Now you know which items need your attention. You can see what workflow step these items are in and when they were last updated. By clicking any of these items, a new tab with that specific content item will be opened. This will shed even more light on where the problem might be. The same goes for the Workflow step overview. By clicking the specific workflow step, either from the graph, or below it, you'll get more information. For example, if you’re interested in items currently being reviewed, click the Review step.

Where is my Spring product update?

Your project’s planning status shows you only the content items that have a due date. If some of your items are missing the due date and you’d like to track their status, you need to add a due date first. This way, you will know if the items run behind schedule – when the due date has passed and the item is still not published, it will show in your Delayed tile of the Planning status. If you’d like to know which content items are missing due dates, see the Missing due dates callout next to the planning status and then click the link. This will open a list of the content items without a due date.
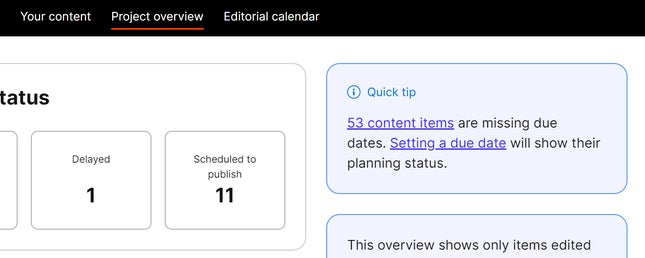
Finding content items without due dates.
Clicking the “53 content items” link shows which specific content items are missing due dates. You’ll see a different number in your projects.

Filtering the results

Sometimes, you’re only interested in seeing the blog posts waiting for an approval. Or maybe you'd like to see how the new guy in your office is handling the reviews. All of this can be done by using the filter on the left. Choose the criteria to your liking and the results will be updated automatically. For example, by choosing the Review workflow step and filtering out the contributors to John Doe only, you’ll see how John is doing in terms of reviewing content items. All saved filters work here as well as in Content & assets and Mission Control > Content status.
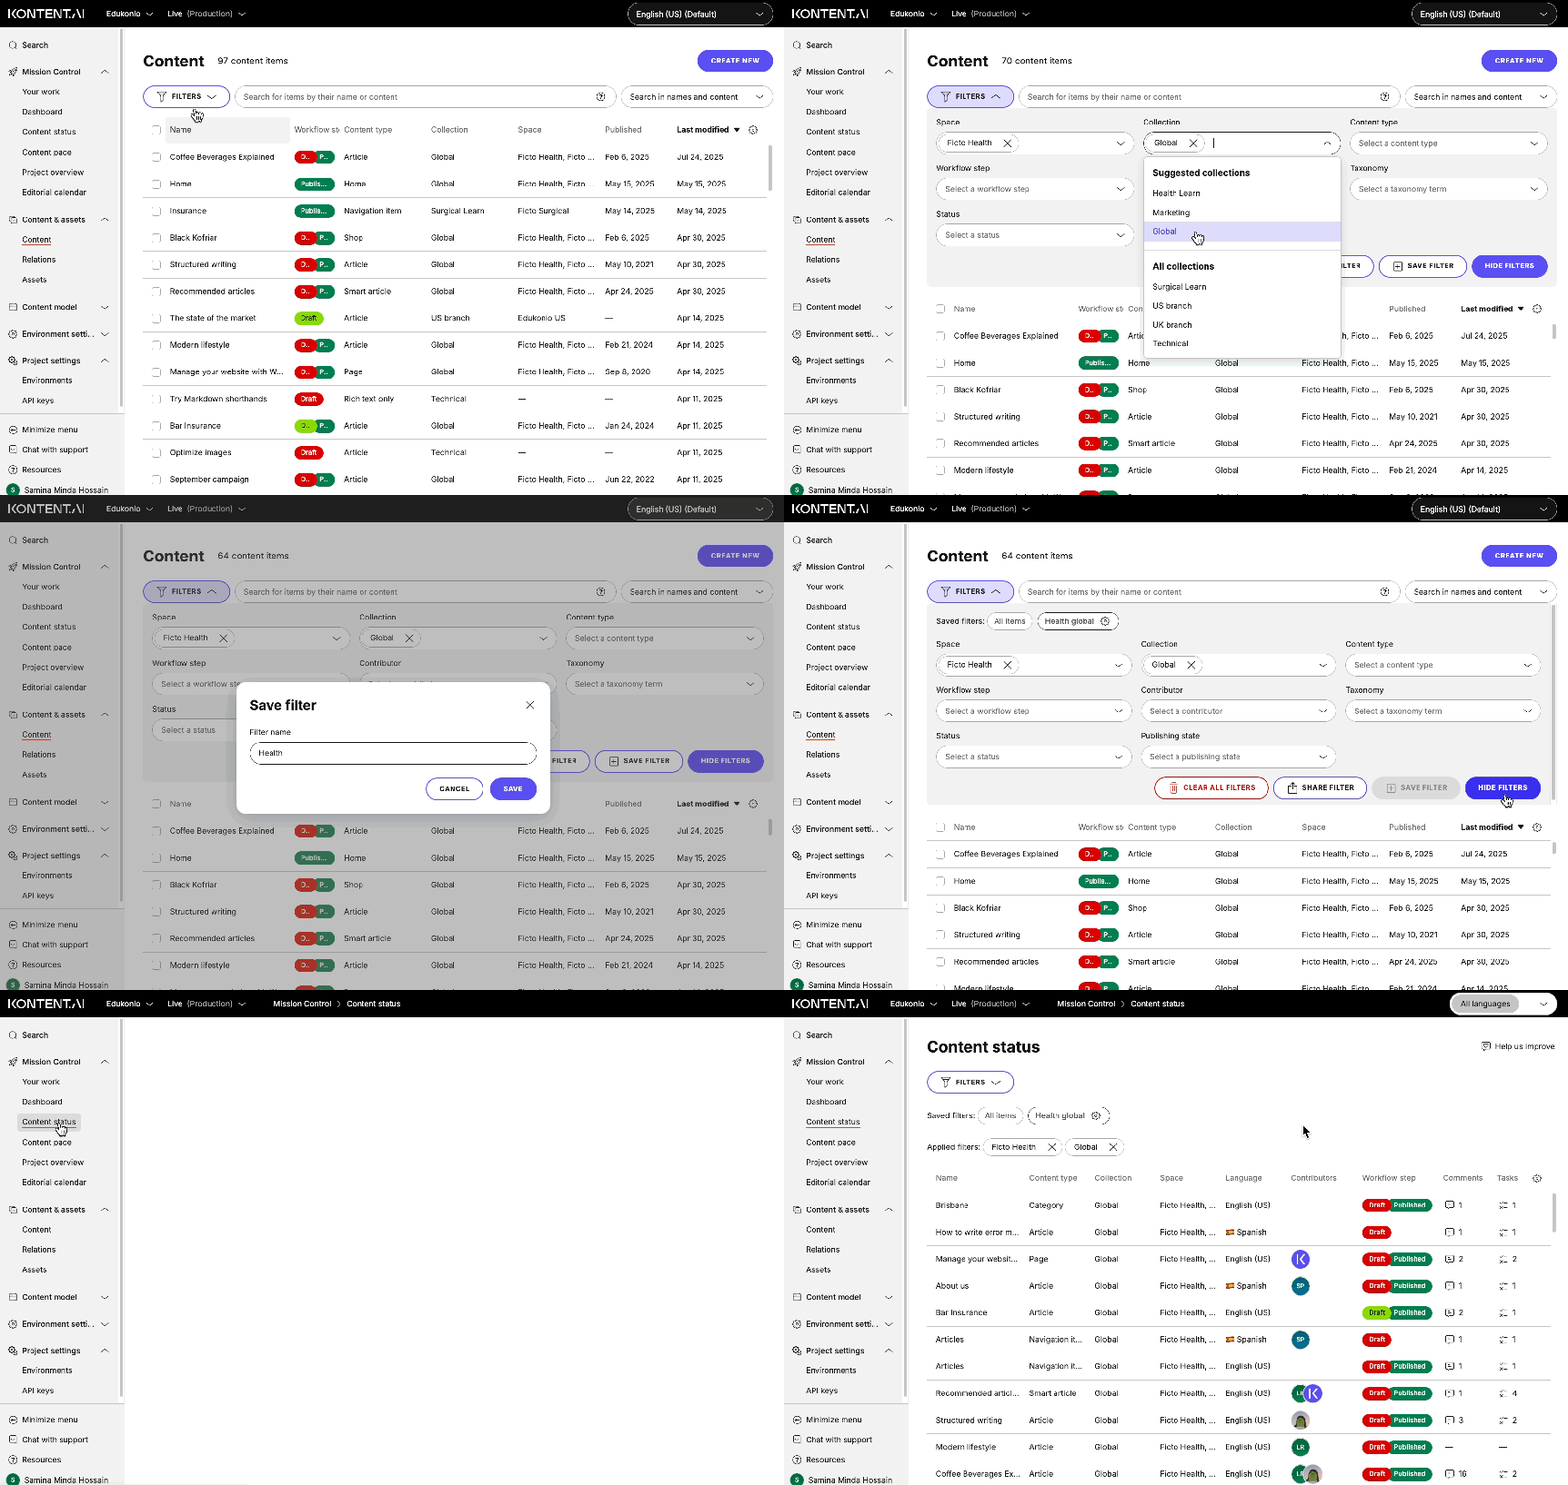
Using saved filters across Kontent.ai
If you frequently filter for the same kind of content, save your filter for later use. Be efficient with your time.
  1. Click Filters to reveal the panel.
  2. Select the filters to refine your results.
  3. Click Save filter.
  4. In Filter name, type a name for the filter.
  5. Click Save.
The saved filter is now shown beside Saved filters in that same panel, where you can use it later.
Filters can be saved in the content items list, project overview, content status, editorial calendar, or dialogs where you select a content item. To rename or remove a saved filter:
  1. Click Filters to reveal the panel.
  2. Click the saved filter.
  3. Click beside the saved filter’s name.
You can now make changes as needed. To share an active filter:
  1. Click Filters to reveal the panel.
  2. Click Share filter.
  3. Click to copy the filter link.
You can now share this link with your colleagues.
Explore your path to mastery
  • Get a bird’s eye view of your content creation plan and process.
This overview shows only items edited in the past 90 days.

Save filters, save time

Edit saved filters

Share a filter

  • Get a complete overview of your project
  • Digging deeper
  • Where is my Spring product update?
  • Filtering the results
  • Saved filters are only visible to you. Every user in the project has their own saved filters.